Strategy deployment#
In the SigTech platform, you can deploy a strategy to run continuously in a live format, as well as specifying the frequency of its run. This generates an output that contains the orders from the strategy at the point of time from which it is run.
Running a strategy in SigTech’s platform can be broken down into three main steps:
Job creation: Make a Python file and create a strategy within a function.
Job deployment: Use Git to commit and push the Python file and generate daily reports.
Results: Make use of the results produced.
This page goes through the process of deploying a strategy in the SigTech platform.
Step 1: Create your job#
Create a Python file#
In your research environment, select Python File under Other to create a new Python (.py) file.
Name your Python file with the suffix _job at the end of the file name: for example, my_strategy_job.py.
Import relevant packages#
Use the code below to import necessary packages:
import sigtech.framework as sig
   from sigtech.framework.default_strategy_objects.rolling_futures import (
       gc_comdty_rici, si_comdty_pre_roll
   )
   from sigtech.framework.strategies.runner.metaflow.decorators import FunctionJob

   import datetime as dtm
   import pandas as pd
   import numpy as np
Create your function and schedule the strategy run#
The next few steps go through creating a function and adding the strategy logic.
First, add the @FunctionJob decorator to your function and pass the relevant parameters into the decorator.
The schedule parameter sets the frequency of the strategy; its argument is a cron expression that defines the minute, hour and day.
Note: Your function must contain at least one parameter, which is self.
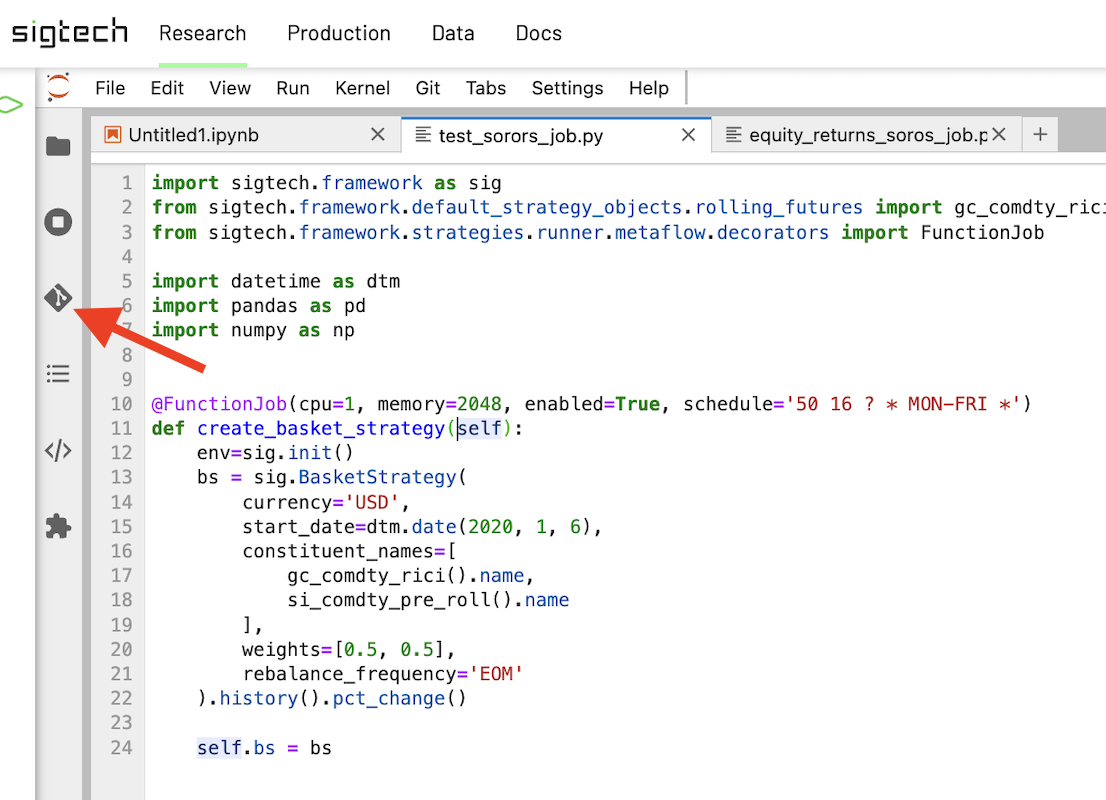
The example code uses the @FunctionJob decorator to schedule the strategy to run at 4:50 PM, Monday to Friday:
@FunctionJob(cpu=1, memory=2048, enabled=True, schedule='50 16 ? * MON-FRI *')
   def create_basket_strategy(self):
       # Function logic to go here
Initialize the SigTech environment within the function#
Add the following code to your function to initialize the SigTech environment:
env = sig.init()
Append the above function with the strategy logic you want to implement. Instead of returning values from the function, assign them to attributes of self.
Example: If you compute a DataFrame df, assign it using self.df = df.
Here is a completed example of a basket strategy using futures:
import sigtech.framework as sig
   from sigtech.framework.default_strategy_objects.rolling_futures import (
       gc_comdty_rici, si_comdty_pre_roll
   )
   from sigtech.framework.strategies.runner.metaflow.decorators import FunctionJob

   import datetime as dtm
   import pandas as pd
   import numpy as np

   @FunctionJob(cpu=1, memory=2048, enabled=True, schedule='50 16 ? * MON-FRI *')
   def create_basket_strategy(self):
       env = sig.init()
       bs = sig.BasketStrategy(
           currency='USD',
           start_date=dtm.date(2020, 1, 6),
           constituent_names=[
               gc_comdty_rici().name,
               si_comdty_pre_roll().name
           ],
           weights=[0.5, 0.5],
           rebalance_frequency='EOM'
       ).history().pct_change()

       self.bs = bs
Step 2: Deploy your job#
Save the Python file#
Save your Python file by selecting File on the top left corner of the screen, then Save Python File from the dropdown menu. If you’re working on a Macbook, use the Cmd+S keyboard shortcut.
2. Commit and push with Git#
For the strategy to be deployed, the corresponding Python file needs to be pushed to your Git repository.
Select the Git icon to the left of your research environment.
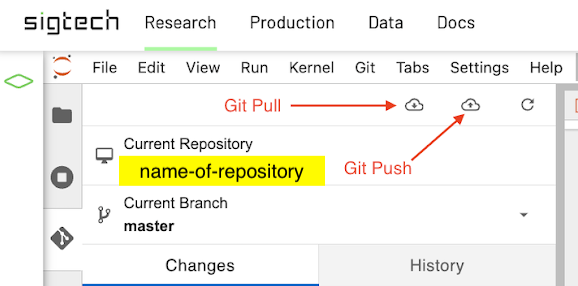
To avoid any merge conflicts in the next steps, select the Git Pull icon.
Under Changes > Changed, click on the + icon next to the file that you need to commit, add a commit message, then select COMMIT. After that, you can click on the Git Push icon.
3. Deploy#
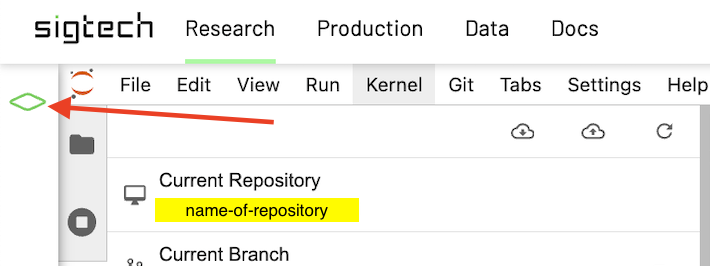
Select the green diamond icon to the left of your research environment.
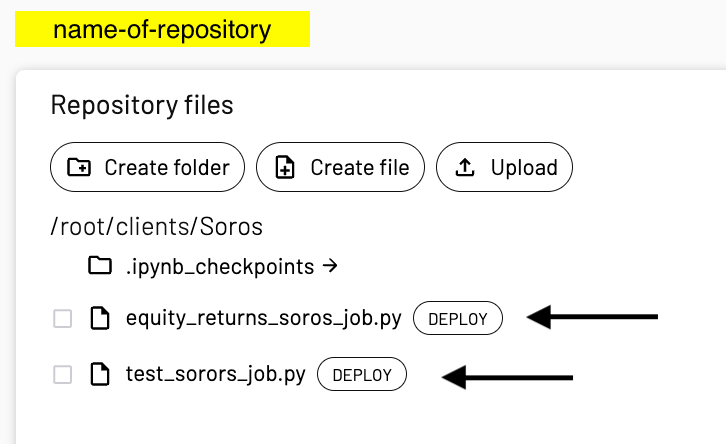
Then select Repository from your personal workspace (or any other workspace that you are using to deploy).
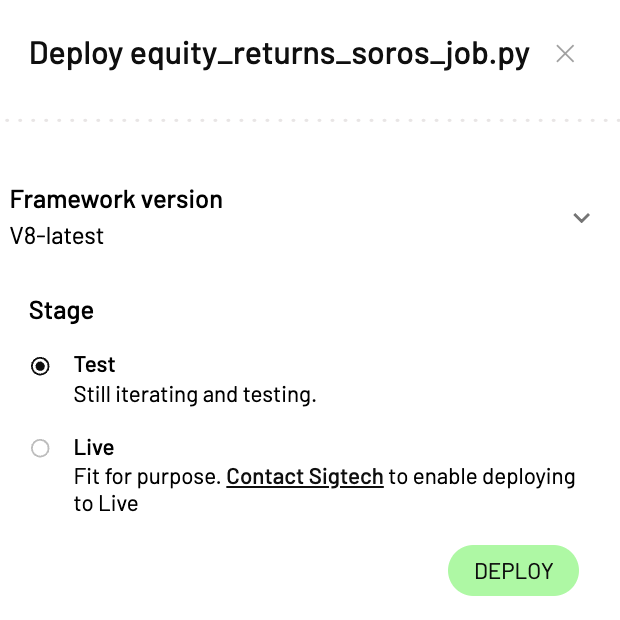
Go to the Python job file you created at the start (the file name that ends with _job). You should see a DEPLOY button next to the Python job file. Select DEPLOY, then Test and v8-latest, then DEPLOY.
Step 3: Get results#
SigTech’s Jobs API provides a method to get data from your executed jobs.
Setup#
Before using the Jobs API, ensure you have both Python and the SigTech Python SDK installed on your machine.
You’ll also need to create a Personal Access Token within the platform and set the environment variable SIGTECH_PLATFORM_TOKEN to the value of this token.
For Windows:
setx SIGTECH_PLATFORM_TOKEN <YOUR_ACCESS_TOKEN>
For macOS and Linux:
export SIGTECH_PLATFORM_TOKEN=<YOUR_ACCESS_TOKEN>
Use the Jobs API#
Use the code below to call the Jobs API:
from sigtech.api.jobs import JobsApi
api = JobsApi()
Run the relevant code in your environment to return the outputs from the job and extract data:
# List all jobs
api.jobs.df()

# List runs for a job
job = api.jobs["my_job_name"]
job.runs.df()

# Get specific output from latest run
run = job.runs.latest
run.outputs["history"].df()

# See outputs from a job
run.outputs.df()

# Get data from a specific named output
run.outputs["history"].df()
run.outputs["positions"].df()
Deactivate your job#
To deactivate a deployed strategy, set enable=False in the @FunctionJob decorator, then re-deploy the strategy.